Guide to Download and Use Bitvise SSH Client for Easy VPS Management
Bitvise SSH Client is a powerful and user-friendly software for connecting and managing remote servers via the SSH protocol. It provides both a command-line interface and a graphical user interface, making it suitable for both beginners and advanced users.
This guide will walk you through the steps to download, install, and use Bitvise SSH Client to efficiently manage your VPS.
1. Key Features of Bitvise SSH Client
- Free for Personal Use: No cost for non-commercial purposes.
- User-Friendly Interface: Simple and intuitive interface.
- Comprehensive Support: Includes SSH, SFTP, and SCP for file transfers.
- High Security: Advanced encryption ensures safe connections.
- Rich Functionality: Features key management, port forwarding, and automation.
2. System Requirements
Before installing Bitvise SSH Client, ensure your system meets these requirements:
- Operating System: Windows 7, 8, 10, 11 (32-bit or 64-bit).
- Hardware:
- Processor: Minimum 1GHz.
- RAM: At least 512MB.
- Disk Space: Minimum of 50MB free.
- Internet Connection: Required for remote server connections.
3. How to Download Bitvise SSH Client
- Visit the Official Website:
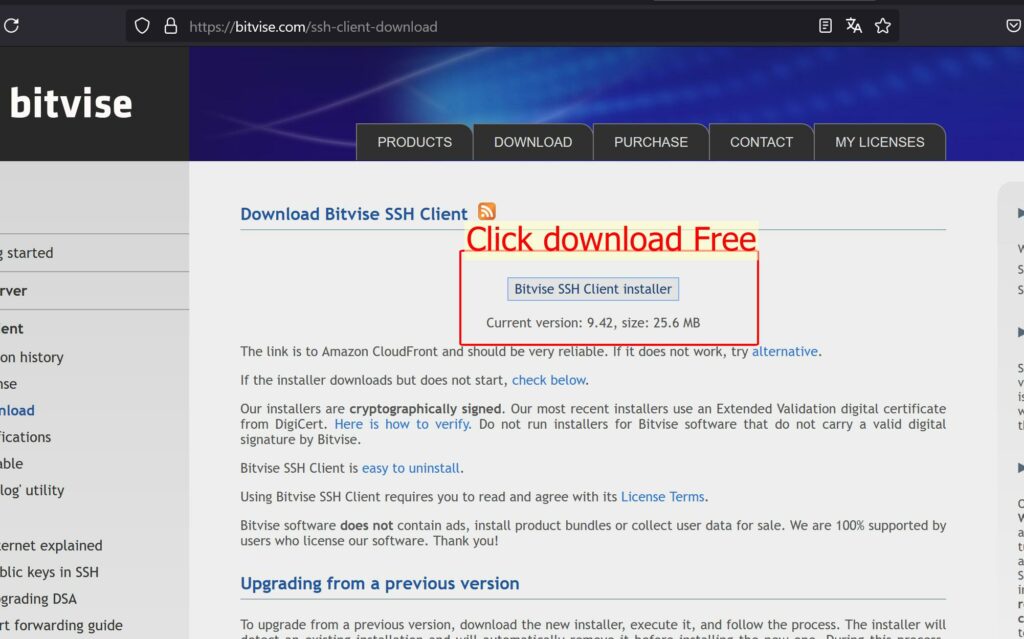
Navigate to the official Bitvise SSH Client download page:
Download Bitvise SSH Client. - Download the Installer:
Click on the Download button to get the installation file (e.g.,Bitvise-SSH-Client-Installer.exe). - Save the File:
Save the installer to your preferred location on your PC.
4. How to Install Bitvise SSH Client
Step-by-Step Installation Guide:
- Launch the Installer:
Double-click the downloaded file (Bitvise-SSH-Client-Installer.exe) to start the installation process. - Choose Language and Accept Terms:
- Select your preferred language for the installation.
- Review and accept the terms of service, then click Next.
- Select Installation Directory:
- Use the default installation folder or specify a custom location.
- Click Install to begin the installation.
- Complete the Installation:
Once the installation is finished, click Finish to close the installer. Open the application from the desktop shortcut or Start menu.
5. How to Use Bitvise SSH Client to Manage VPS
Step-by-Step Guide to Connect to VPS:
- Open Bitvise SSH Client:
Launch the application from your desktop. - Enter Connection Details:
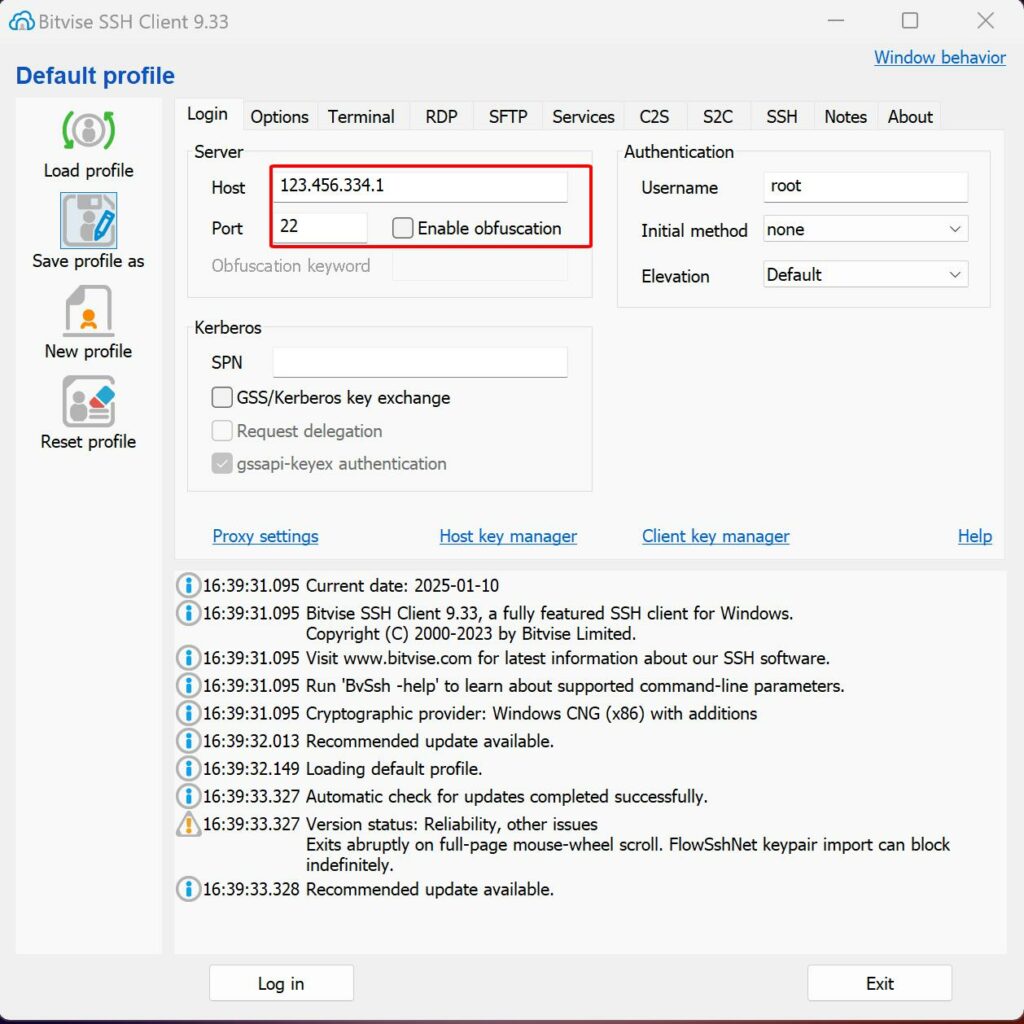
- Host: Input the IP address or domain name of your VPS.
- Port: Default is 22 (SSH port).
- Username: Enter your VPS username (typically
root). - Initial Method: Choose password or public key based on your preferred authentication method.
- Provide Authentication Details:
- If using a password, enter it in the Password field.
- If using a key file, click Load Key to upload your private key file.
- Connect to VPS:
- Click Login to establish a connection.
- On the first connection, verify the server’s fingerprint and click Accept and Save if it matches.
- Manage Your VPS:
- Use the Terminal Console for command-line management.
- Transfer files with ease using the SFTP interface.
6. Tips for Effective Usage of Bitvise SSH Client
- Save Connection Profiles: Save your server details to avoid re-entering them each time.
- Secure Authentication: Always keep your password or private key file safe.
- Use Automation Features: Utilize scripts in Bitvise to automate repetitive tasks.


